Pages

Thursday, October 29, 2015

Toddler Dress out of a T-shirt

The last time I posted on this blog was when I was pregnant! What sweet memories. The last three years have been full of sewing projects, but not many were photographed. I've discovered a new favorite genre of sewing: baby and toddler clothes!

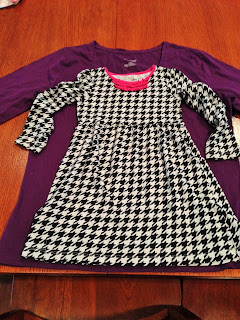
Here is a tutorial for making a toddler dress out of a t-shirt. I copied a dress that I already had in 4T, and I used a size L women's long sleeve t-shirt. The best part about this dress is that you don't have to do any hemming if you line up the neckline, sleeve hem, and skirt hem with the corresponding parts of the shirt!

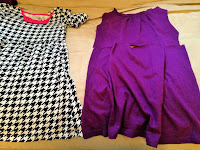
1. Cut off the shirt sleeves. Cut the shirt up the sides to separate the front and back. Lay the dress on the shirt front to determine the cutting line for the dress bodice front, placing the neck of the dress on the neck of the shirt.
Bodice front
2. Cut leaving a half inch seam allowance. Fold in the dress sleeves to guesstimate the armhole shape.

3. Use the remaining fabric from the shirt front to make the skirt front. Cut off the extra fabric into a rectangular shape.

Bodice front and skirt front
Bottom of shirt to be made into skirt front


4. Gather the top of the skirt front and evenly fit to the bodice top. Sew right sides together to complete the dress front.
Skirt front gathered to match bodice
Dress front
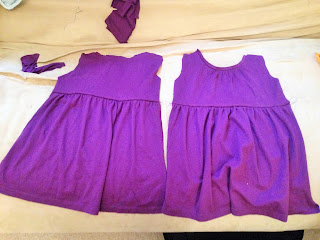
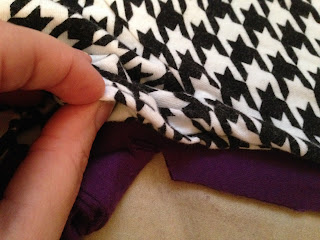
5. Cut out the dress back, using the shirt back for bodice and skirt. Repeat steps 1-4. Remember to line up the neck. It's easier if you fold the pieces in half and make a small cuts for guidance. Remember seam allowance. Check the back pieces with the front pieces to make sure that the bodice/skirt seam will match up.
Bodice back lined up

Bodice back (folded)


Dress front and back
6. Sleeves:
Line up dress sleeve and shirt sleeve so that hems match

Cut shirt sleeve leaving seam allowance

Cut slit to mark seam allowance for sleeve top

I accounted for the gather in the dress sleeve

Basic sleeve shape

No serger needed - just sew 1/4 inch away from stitch line and cut close to second stitch line.

Attach sleeve to armhole and sew (I added a little pleat at the top instead of gathering)

I wish I had a better picture of the finished product, but...this is dress is being modeled by a live toddler who would rather play with my machine than be photographed.

Saturday, December 1, 2012

Turn a Pair of Jeans into Maternity Jeans

Or pants...or skirts...or whatever. 

Jeans on left are store bought, jeans on right are DIY
I will never buy a pair of maternity jeans again! I spent $40 on a pair of maternity jeans a few weeks ago. I was getting to the point where I had to stop zipping my jeans because the waistband cut into my belly. The maternity jeans fit okay but kept sliding down my waist. I discovered a strip of elastic with slits that was supposed to act as a belt, but it didn't help the pants stay up very well. And then the elastic started unraveling...


Here it is - in pictures!

1. Remove the waistband from the jeans
If you pull the right loop, the machine chain stitch will come off quickly.

To remove belt loops, pull stitches from inside first
Serge the raw edge. Serge over the zipper flap, and avoid the rivets.
2. Make a stretchy waistband

Cut 1/3 of a yard of 54 inch wide fabric. Cut again on the folded edge for a 27-inch wide piece.
Fold the rectangle in half. Now it is a square!
Serge the raw edge of the square OPPOSITE THE FOLD
Fold in half, turning the seam inside and joining the raw edges. Serge the raw edges together.
3. Join the stretchy waistband to the jeans.

Mark centers and side of waistband (the seam is your other side)
The stretchy waistband "tube" goes over the jeans. Match serged edges and centers/sides of jeans with waistband centers/sides. The waistband will be smaller than your jeans, so stretch it as you pin.
On your sewing machine, sew stretchy waistband to jeans. I use a thick (100/16) needle. If you have a serger that does chain stitch, that would work also and the waistband would have more "give."
Tricked you! It's a skirt!
I have tried this with three pairs of jeans, one pair of pants, and one skirt. At first, I serged the waistband onto the jeans instead of sewing it (like Step 3 shows). I will wait and see which method holds up better after wearing and washing several times. 

Note: Sewing over the Zipper
After I pulled off the original waistband, the jeans were stretchy enough (2% spandex) to pull over my hips with the zipper zipped. I kept it zipped when I sewed on the stretchy waistband, but made sure to push the zipper pull out of the way when I serged and sewed. My skirt is only 1% lycra (stretchy fabric), so I have to be more careful with it. 

My first method (serging the two together instead of sewing in Step 3) also allowed the waistband to be more stretchy.

I spent $27 on three pairs of name brand jeans at our local Dirt Cheap. I bought stretchy fabric for $9 a yard (I could've gotten it cheaper). I made four stretchy bands out of one yard of fabric. Each pair of jeans ended up costing about $12. You may find maternity clothes at a second hand store for less, but the ones I've seen look like they've gone through three pregnancies already. 

Name brand maternity jeans for $12 a pair? I think yes!

Wednesday, June 27, 2012

Sewing Classes

Three Projects

I've had many friends ask me about doing a sewing class, so I've been thinking of some projects that would work for a want-to-be-seamstress with no prior experience.

A lot of girls that I talk to would love to learn how to sew but have too-fresh memories of their junior high sewing experiences (a pillow that went horribly wrong, a jumper that you were too embarrassed to wear, a sewing machine that had something against you). But with today's designer fabrics (think Amy Butler), the advent of Etsy, and plenty of online help, I would say that it is definitely worth it to try again!

Speaking of cute fabrics, here is a great beginner's project: place mats.

These are pretty straightforward. Skills learned: straight stitching, turning corners, and hand-basting.

Oh, and these are reversible, too.

After this project, the next step would be following a simple sewing pattern: an apron. 


This is not-yo-grandma's apron. Well, mine has some nearly vintage fabric thrown in with my coordinating Hobby Lobby fabrics. Butterick pattern 5474. Skills learned: patterns and ruffles.

Lots of mamas would love to sew their kids blankets, and I would recommend this project for someone with some sewing experience who would like to start quilting. 

Skills learned: piecing and bias binding. Note the backing for this almost-quilt.


Instead of working with three layers, I used just two: the pieced top and some soft pink polka dot fleece. It's so cuddly! Imagine how cute it would be in blues and greens or browns and blues for a baby boy...


I am starting sewing classes in my home this summer, and these are the projects that I am teaching. (Place mats and apron this summer, baby blanket this fall). E-mail me for more info!


Friday, April 13, 2012

Spring Sewing

Since our move I have been telling myself that I will not start a new project (or even buy material for a new one) until I finish my sewing to-do list. This is really difficult, especially since I just got a dress form from Tim for my birthday and I want to start doing some simple pattern design.

Notwithstanding, I have been making progress. Since we spent about a month in a hotel (waiting for our house to come available) I had a good amount of time to get some projects done. My first project was a tunic: Butterick 5450. I'm not much of a tunic person, but I thought that this would be cute. I do like how it turned out, and the pattern was fairly simple to follow. I recently started using tracing paper for my darts, and this makes the darts so much easier!

My other recent (completed) project was a pair of pants. I used Simplicity 2860 - Average. I have never tried pants before, so this was quite a learning experience. I had to figure out whether I was slim, average, or curvy.

To do this, one must measure the front crotch, then the back crotch. Then, based on the chart of measurements given, one can supposedly determine whether one is slim, average, or curvy. Well, my front measurement was slim and my back measurement was curvy. I decided that I must be average, since my measurements didn't match up with the chart.

After determining my shape, I should have gone on to determine my size. I assumed that since I am a size 12 for dresses, skirts, and blouses, that I am also a size 12 for pants. BIG MISTAKE!!! If I had simply taken the time to measure myself... well, let's just say that I could have saved myself some grief.

Thankfully, I had enough seam allowance to let the pants out about two inches. So they just barely fit me now. But they do look nice. I was going to wear them with my new tunic, but my husband doesn't think that they match. (I trust his judgement, so I will find some other pants to wear with it - maybe jeans?).

Before
My most recent project is a slipcover for a seat. This involved:

1. Tracing the cushions onto the fabric (which I laid out on the floor). 

2. Joining the front piece of fabric to the back piece of fabric with a bias strip (this made it easier to follow the curve of the cushion). 

3. I left openings to slip the cushions out and added ties (this cushion apparently attaches to a swivel chair).

It was pretty simple. So now maybe I am ready to do a couch slipcover...

After

Tuesday, January 31, 2012

Baby Quilts

Baby Quilts 

 A few weeks ago I got to take home some flannel scraps for baby quilts. I was especially charmed by the pretty pinks, oranges, and yellows!

I started with 1/4 yard of four different flannels for the top, and 1 yard of flannel for the backing. From each 1/4 yard, I was able to cut 16 (4.5 inch square) blocks.


I choose two fabrics to form a block (four blocks are pictured)


Blocks ready to sew
Using my 1/4 inch presser foot
All seams pressed in the same direction


When rectangle is inverted, seams on back will point in opposite directions
Squares sewn in strips of four
Each strip sewn to form the square quilt top
Each square is pinned and ready to be tied

Finishing Method #1
 
I wanted to try something different for this quilt. Instead of binding it, I put the wrong sides together and sewed a 1/2 inch seam around the outside. Then I cut 1/4 inch snips every 1/4 inch around the outside. I hoped that when I washed it it would make a fluffy fringe. It didn't look perfect, but I thought it was cute!
It got a little wrinkly in the wash :(

Finishing Method # 2
For the girl blanket, I opted to go with a 2 inch border and binding.
After sewing the border, I used the embroidery function on my machine to do a little snowflake in the middle of each square. I started in the center of the quilt and worked my way out. This ended up being much quicker and prettier than tying it myself.


Snowflake embroidery
1 1/4 inch binding - cut with the grain of the fabric and machine sewn (as opposed to bias cut, mitered corners, and hand stitched)
So...I ran out of steam to talk about how I actually did the binding. Sorry! The reason I put all this on here is because these are the sorts of things that I wonder about. And I forget how to do it if I don't write it down for myself.


The Girl Quilt - I love it!


Made by Lena