Pages

Friday, April 13, 2012

Spring Sewing

Since our move I have been telling myself that I will not start a new project (or even buy material for a new one) until I finish my sewing to-do list. This is really difficult, especially since I just got a dress form from Tim for my birthday and I want to start doing some simple pattern design.

Notwithstanding, I have been making progress. Since we spent about a month in a hotel (waiting for our house to come available) I had a good amount of time to get some projects done. My first project was a tunic: Butterick 5450. I'm not much of a tunic person, but I thought that this would be cute. I do like how it turned out, and the pattern was fairly simple to follow. I recently started using tracing paper for my darts, and this makes the darts so much easier!

My other recent (completed) project was a pair of pants. I used Simplicity 2860 - Average. I have never tried pants before, so this was quite a learning experience. I had to figure out whether I was slim, average, or curvy.

To do this, one must measure the front crotch, then the back crotch. Then, based on the chart of measurements given, one can supposedly determine whether one is slim, average, or curvy. Well, my front measurement was slim and my back measurement was curvy. I decided that I must be average, since my measurements didn't match up with the chart.

After determining my shape, I should have gone on to determine my size. I assumed that since I am a size 12 for dresses, skirts, and blouses, that I am also a size 12 for pants. BIG MISTAKE!!! If I had simply taken the time to measure myself... well, let's just say that I could have saved myself some grief.

Thankfully, I had enough seam allowance to let the pants out about two inches. So they just barely fit me now. But they do look nice. I was going to wear them with my new tunic, but my husband doesn't think that they match. (I trust his judgement, so I will find some other pants to wear with it - maybe jeans?).

Before
My most recent project is a slipcover for a seat. This involved:

1. Tracing the cushions onto the fabric (which I laid out on the floor). 

2. Joining the front piece of fabric to the back piece of fabric with a bias strip (this made it easier to follow the curve of the cushion). 

3. I left openings to slip the cushions out and added ties (this cushion apparently attaches to a swivel chair).

It was pretty simple. So now maybe I am ready to do a couch slipcover...

After

Tuesday, January 31, 2012

Baby Quilts

Baby Quilts 

 A few weeks ago I got to take home some flannel scraps for baby quilts. I was especially charmed by the pretty pinks, oranges, and yellows!

I started with 1/4 yard of four different flannels for the top, and 1 yard of flannel for the backing. From each 1/4 yard, I was able to cut 16 (4.5 inch square) blocks.


I choose two fabrics to form a block (four blocks are pictured)


Blocks ready to sew
Using my 1/4 inch presser foot
All seams pressed in the same direction


When rectangle is inverted, seams on back will point in opposite directions
Squares sewn in strips of four
Each strip sewn to form the square quilt top
Each square is pinned and ready to be tied

Finishing Method #1
 
I wanted to try something different for this quilt. Instead of binding it, I put the wrong sides together and sewed a 1/2 inch seam around the outside. Then I cut 1/4 inch snips every 1/4 inch around the outside. I hoped that when I washed it it would make a fluffy fringe. It didn't look perfect, but I thought it was cute!
It got a little wrinkly in the wash :(

Finishing Method # 2
For the girl blanket, I opted to go with a 2 inch border and binding.
After sewing the border, I used the embroidery function on my machine to do a little snowflake in the middle of each square. I started in the center of the quilt and worked my way out. This ended up being much quicker and prettier than tying it myself.


Snowflake embroidery
1 1/4 inch binding - cut with the grain of the fabric and machine sewn (as opposed to bias cut, mitered corners, and hand stitched)
So...I ran out of steam to talk about how I actually did the binding. Sorry! The reason I put all this on here is because these are the sorts of things that I wonder about. And I forget how to do it if I don't write it down for myself.


The Girl Quilt - I love it!

Wednesday, January 4, 2012

Americana Table Runner - A Homemade Christmas Gift

I decided to try some homemade Christmas gifts this year. My goal was to make items that were unique and personal, but that didn't appear too "homemade" (like, "Here, I drew this picture for you!"). 

This summer I visited a pottery shop in Pigeon Forge. It had quilted table runners, place mats, and pot holders. I wanted to buy them all, but decided that I could probably make some of those things myself. Besides, it's no fun to visit an All-American town and find that your pot holder was made in India.

A few weeks later I found a quilting book with directions for a quilted table runner, so I decided to give the table runner a try. Nice thing about table runners: they don't have too much fabric, so they're easier to work with than a full sized quilt.

Or so I thought. The second set of instructions had a measurement mistake. I ended up having to cut and re-cut my diamonds all through the quilt, along with the borders. Sigh...
Diamonds for the star

I love Americana!

Starting to look like the picture...

"Setting in" took some practice     

Once the top was pieced, it was beautiful! I couldn't wait to finish it, so I went ahead and sewed on the back and the binding. Mistake number two. 
 
I started quilting the top and realized that everything was pulling the wrong way. In addition, I had cut the wrong size for the end borders. I had to undo all my quilting (any quilter knows that you're supposed to quilt before you bind, however, I am not a quilter), and I had to take off all the binding and the end borders. 

After I took the thing apart I cut new borders, binding, and filling, and redid the machine quilting by starting from the center and working my way out. In the end, it turned out all right, and I wouldn't mind making another!
Matching pot holders

The finished product!


Tuesday, November 8, 2011

Old Dress, New Accessories

I made myself a gown for the Marine Corps Birthday Ball last November. I used maroon crepe-back satin. It has a good weight and a good drape. Since I had one and a half yards of maroon crepe-back satin left over, this year I decided to make myself a wrap and a clutch purse. I hate to throw away fabric! But then again, I hate how much room leftover fabric takes up in my closet.

For The Wrap, I used McCall's 3880, view E. I liked the lacy look, so I layered silver lace over the satin.
The Wrap
Inside (A)
Outside (B)

 The trickiest part was the opening, where the wrap pulls through itself. I followed the directions given for the pattern, which says to hand stitch the closure shut after you turn it right side out {see Outside (B)}. I think it would have looked more professional if I had stitched it before I turned it right side out {see Inside (A)}.

The picture on the pattern envelope tricked me - to me, it looks like black lace on silver fabric. So the other surprise about the pattern is that you are supposed to have interfacing on the top layer. Of course, if I had put interfacing on the silver lace, the interfacing would have shown right through. So I skipped that step. Apparently, the black lace in the picture that I was looking at was all one piece of fabric.

The only other problem I came across was that the weight of the satin pulled the back of the wrap away from the lace. I fixed that by tacking down the lace with tiny stitches. Problem solved!


For The Clutch Purse, I did not use a pattern, per se. I looked at the directions for Simplicity 2166 and drew a rough sketch of what the pattern pieces looked like. It was pretty easy, since there were only two basic pieces - the purse and the flap. The purse is a 12x10 rectangle. I ironed interfacing to the wrong side of the fabric. I then folded it in half and clipped the corners (A1 - A3).

A 1

A 2
A 3


 Next, I cut the flap (it also has interfacing on the back). It is 5x12. I also clipped the corners of the flap. Then I tacked the lace on top (B1 - B2).
B 1
B 2
 Next, I folded the right sides together and sewed down toward the clipped edge. I also made a small seam across the clipped edge. Then I ironed the seams flat (C1 - C2)

(Inside) C 1
(Outside) C 2

I wanted a bow on my purse, so I made one and basted it to the front flap.

 I cut another piece of fabric to match the flap, sewed it onto the flap with right sides together leaving one long side open (the side that joins to the purse). Then I turned it right side out, ironed, and attached it to the bag (D 1). To finish, I turned in the raw edges on the top of the purse. I also did edge-stitched across the top of the flap (D 2).
D 1
D 2

Wednesday, October 26, 2011

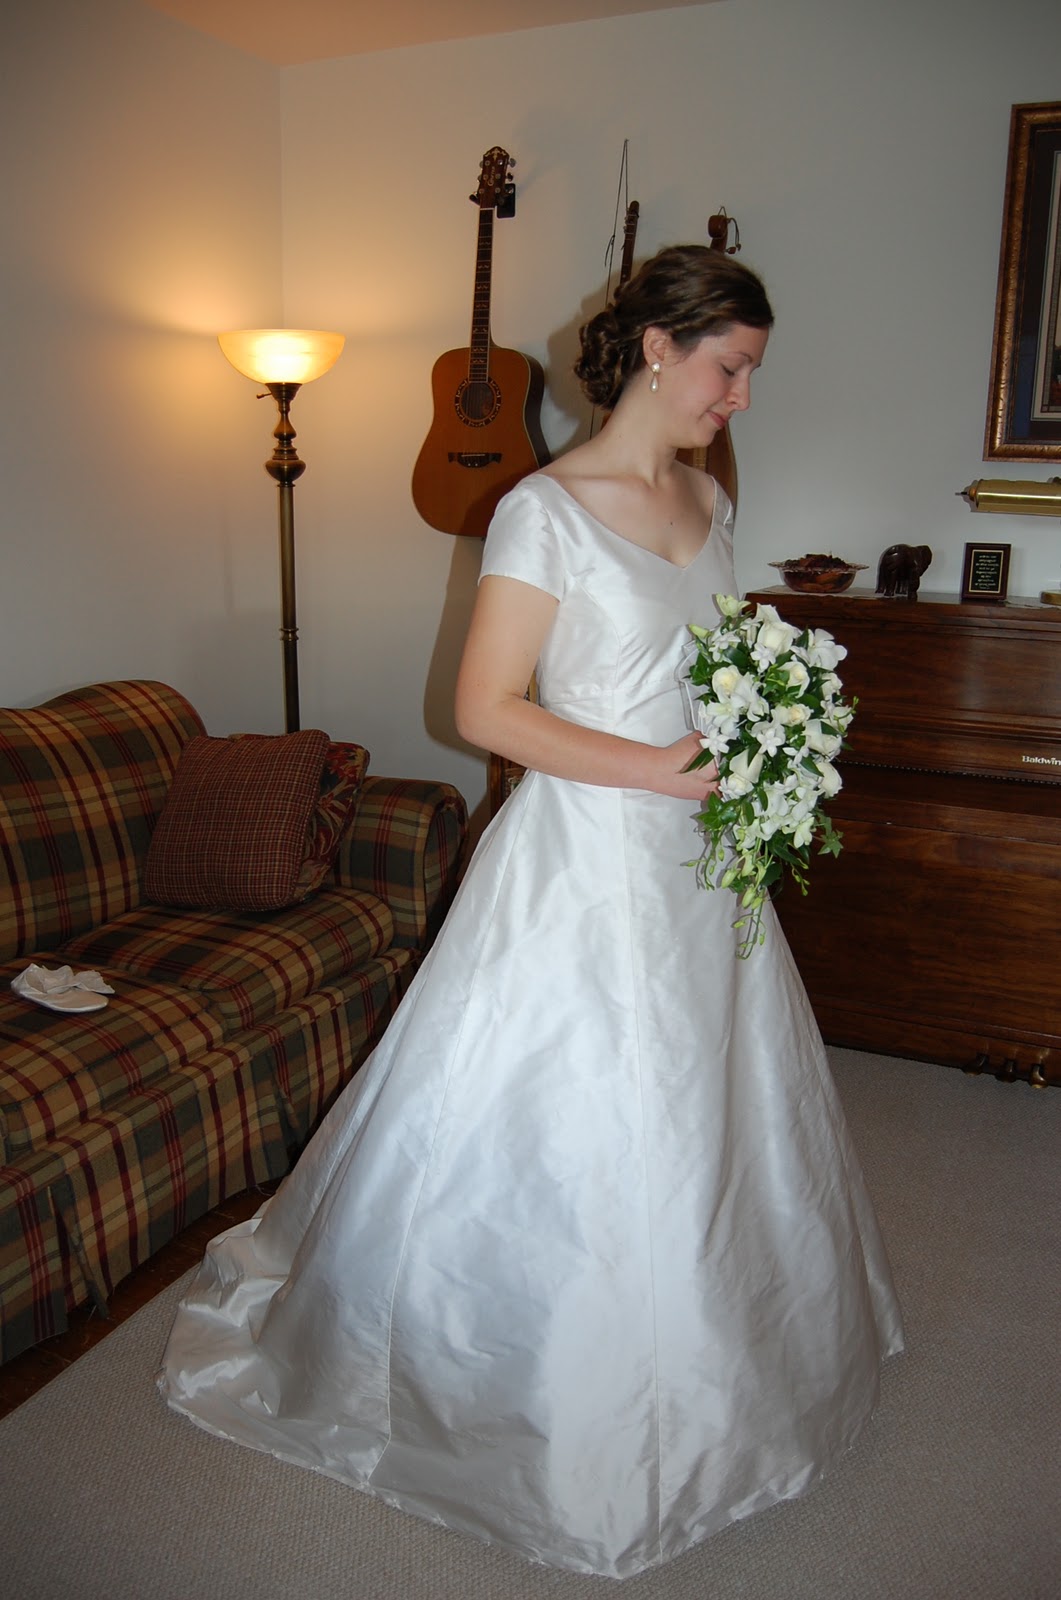
My Wedding Dress

My mom sewed her wedding gown when she was married in 1985. She was so tiny! According to my grandmother, her waist was 18 inches or something ridiculously small like that. Of course, wanting to be like my mom, I decided that I should try to sew my own wedding dress (I did not try for the 18 inch waist). In fact, I did not try on a single wedding gown at David's Bridal or any other bridal store.

My Grammie and I looked through pattern books at a local fabric store for a wedding dress that would fit my criteria (sleeves and a modest neckline). We found this pattern: http://voguepatterns.mccall.com/v2788-products-16.php?page_id=186 (Vogue 2788).

I liked the silk look and decided to go with that rather than satin or sheer. Since the silk at JoAnn Fabrics looked sickly, I ordered some Dupioni silk through my aunt - she works with curtain fabrics.

So...

Week One: bodice and skirt
Week Two: attached bodice to skirt
Week Three: zipper and finishing touches

One oddity about the pattern was that it called for the skirt lining to be attached to the skirt in a seam along the bottom. I did not want the layers attached, so I hemmed the skirt and lining separately.

Another oddity about dress patterns is that the sizes that they give on the back of the pattern envelope are bigger than normal dress sizes. I am normally a size 8. According to the measurements on the envelope, I should be right between pattern size 12 and pattern size 14. I go with a pattern size 12.

Thanks to my grandmother's advice, I made the wedding dress a pattern size 12 (I almost went with the 14). And even then I had to take it in a bit more at the waist.

Here are some dress pictures!

Front View
Back View
Bodice


I love how the Dupioni silk has both sheen and texture.


I made my slippers, too!


For the financially minded: the fabric, buttons, zipper, and pattern for my dress cost under $150. I absolutely loved my dress - and I still love it!
 

Made by Lena